Walkthrough:High Class Heist
"High Class Heist" is a job in "Tide of Terror" of Sly Cooper and the Thievius Raccoonus.
Walkthrough
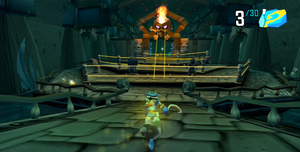
Upon entry, you will find clue bottles #1 and #2. Up ahead, lasers are everywhere, and you must dodge them. Clue #3 lies just behind a corner near the siren. You will then enter into a large, open area featuring tougher security. The lasers stemming from the skull's eyes will follow you around as soon as you step into the stone floor. Weave your way around the stationary laser fences to avoid contact. You will also end up activating a signal repeater here, and you will find the vault, located to the far right. Make note of where it is after gathering all of the clues. Make sure to smash the siren before making any more movements.
Three clues (#4 – #6) lie on the left side of the steps, and three more (#7 – #9) are found at a break in the fence right of the stairs. A clue bottle safe containing clues #10 and #11 is located near the alarm siren. On both sides of the skull eyes are two clues (#12 – #15). You will need to destroy the stone statues to reach them. Just behind the eyes is clue #16. Getting up to it will require some skillful maneuvering; just at the place where clues #12 and #13 were collected, continue and walk behind that location. Continue in that direction until you reach the clue. Head down the walkway past the gate, and you will find two more clue bottle safes, containing clues #17 – #20, in addition to some belly walruses, which you must take out to avoid danger.
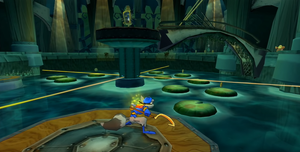
You will then approach several lily pads in the water. Before proceeding, collect clue #21 on the wooden platform, and then the extra life on the platform to the right. This section of the area has lasers rotating over the lily pads, meaning you should precisely time your jumps. After landing on a lily pad, be sure to jump off it in time because your weight will cause them to sink. One of the lily pads has clue #22 sitting on it. These lily pads lead to a small platform with the alarm siren and a small pipe you can ascend to reach the upper walkway. The next signal repeater is located on this walkway, next to a pillar, where you will also find clues #23 and #24. To retrieve them, sneak along the pillar's edge.
Further up are three spotlights, with clues #25 and #26 sitting within their path. It is impossible to bypass the final one (which is stationary) head-on without sounding the alarm, so you need to sneak along another pillar's edge, which will take you out of its range. Ahead, you will find more searchlights, with clues #27 and #28 within their paths as well. After grabbing those clues, sneak along the next pillar's edge, where you will reach the siren. You must smash it to deactivate the security system. The final two clues (#29, #30) are located just behind the final pillar, and just past the small bridge is a platform holding the treasure key. Before grabbing the treasure key, return to the vault. To crack the vault, dial in 4-3-6.


